Protect Your Online Privacy with Ghostery
[Update 12-11-2015 While everything in this tutorial still works, I should note that I don’t actually use Ghostery anymore. Instead I’ve found uBlock Origin for Chromium and Firefox to be far more robust, customizable and powerful. It’s also open source. For most people I would continue to suggest Ghostery, but for the particularly tech savvy, check out uBlock.]
There’s an invisible web that lies just below the web you see everyday. That invisible web is tracking the sites you visit, the pages you read, the things you like, the things you favorite and collating all that data into a portrait of things you are likely to purchase. And all this happens without anyone asking your consent.
Not much has changed since I wrote about online tracking years ago on Webmonkey. Back then visiting five websites meant “somewhere between 21 and 47 other websites learn about your visit to those five”. That number just continues to grow.
If that doesn’t bother you, and you could not care less who is tracking you, then this is not the tutorial for you.
However, if the extent of online tracking bothers you and you want to do something about it, there is some good news. In fact it’s not that hard to stop all that tracking.
To protect your privacy online you’ll just need to add a tool like Ghostery or Do Not Track Plus to your web browser. Both will work, but I happen to use Ghostery so that’s what I’m going to show you how to set up.
Install and Setup Ghostery in Firefox, Chrome/Chromium, Opera and Safari.
The first step is to install the Ghostery extension for your web browser. To do that, just head over to the Ghostery downloads page and click the install button that’s highlighted for your browser.
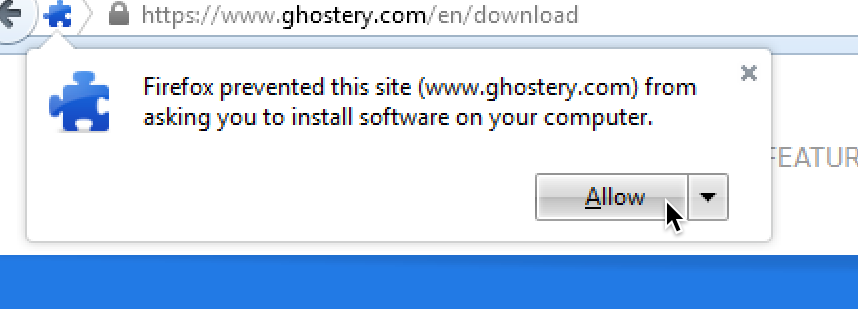
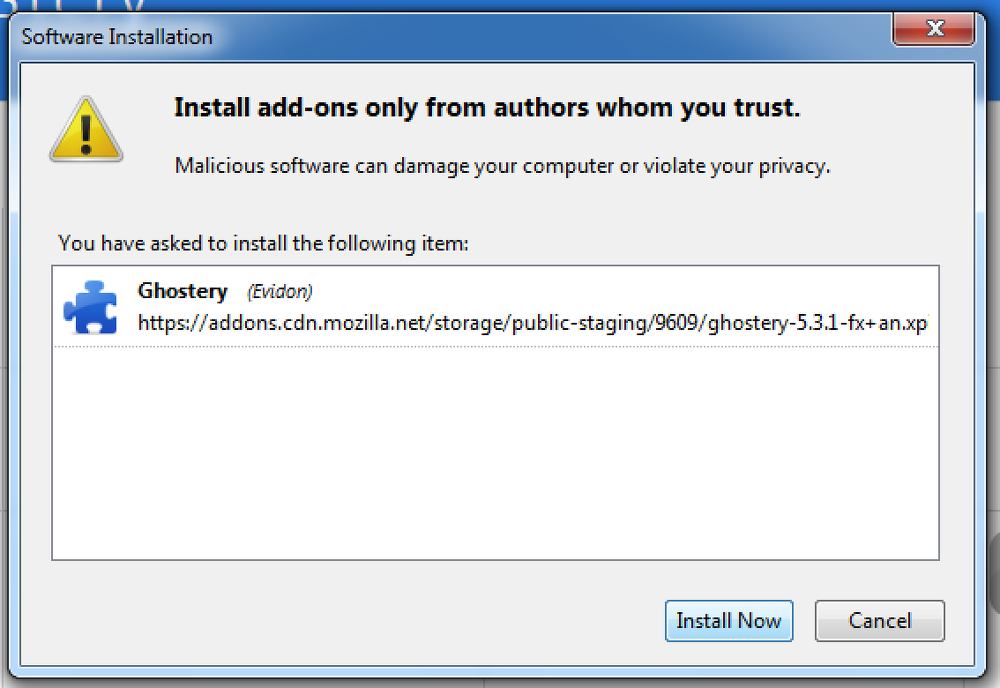
Some browsers will ask you if you want to allow the add-on to be installed. In Firefox just click “Allow” and then click “Install Now” when the installation window opens up.

- In Firefox click Allow…
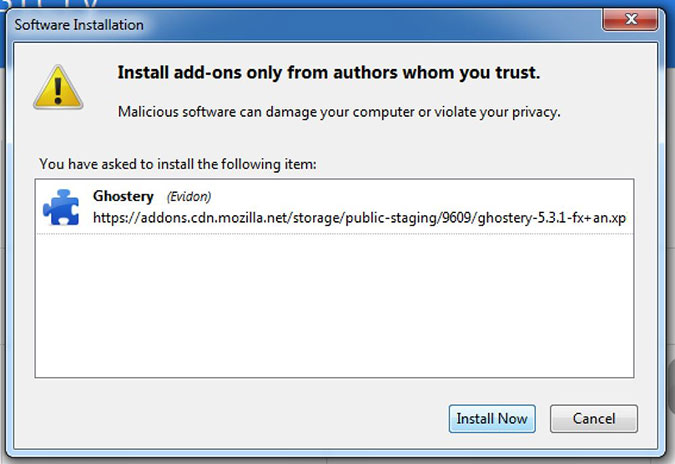
- …and then Install Now
If you’re using Chrome just click the Add button.
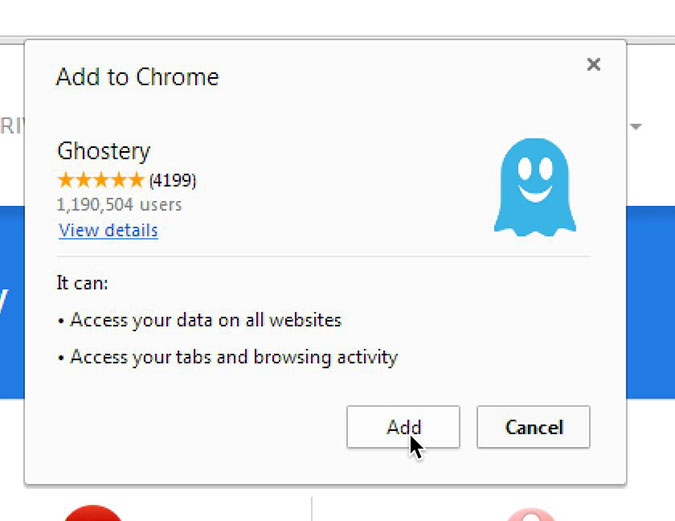
- Installing extensions in Chrome/Chromium

Ghostery is now installed, but out of the box Ghostery doesn’t actually block anything. That’s why, once you have it installed, Ghostery should have opened a new window or tab that looks like this:
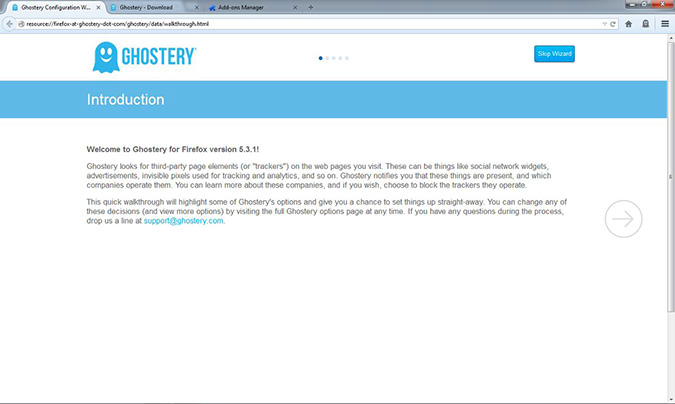
- The Ghostery install wizard
This is the series of screens that walk you through the process of setting up Ghostery to block sites that would like to track you.
Before I dive into setting up Ghostery, it’s important to understand that some of what Ghostery can block will limit what you see on the web. For example, Disqus is a very popular third-party comment system. It happens to track you as well. If you block that tracking though you won’t see comments on a lot of sites.
There are two ways around this. One is to decide that you trust Disqus and allow it to run on any site. The second is to only allow Disqus on sites where you want to read the comments. I’ll show you how to set up both options.
Configuring Ghostery
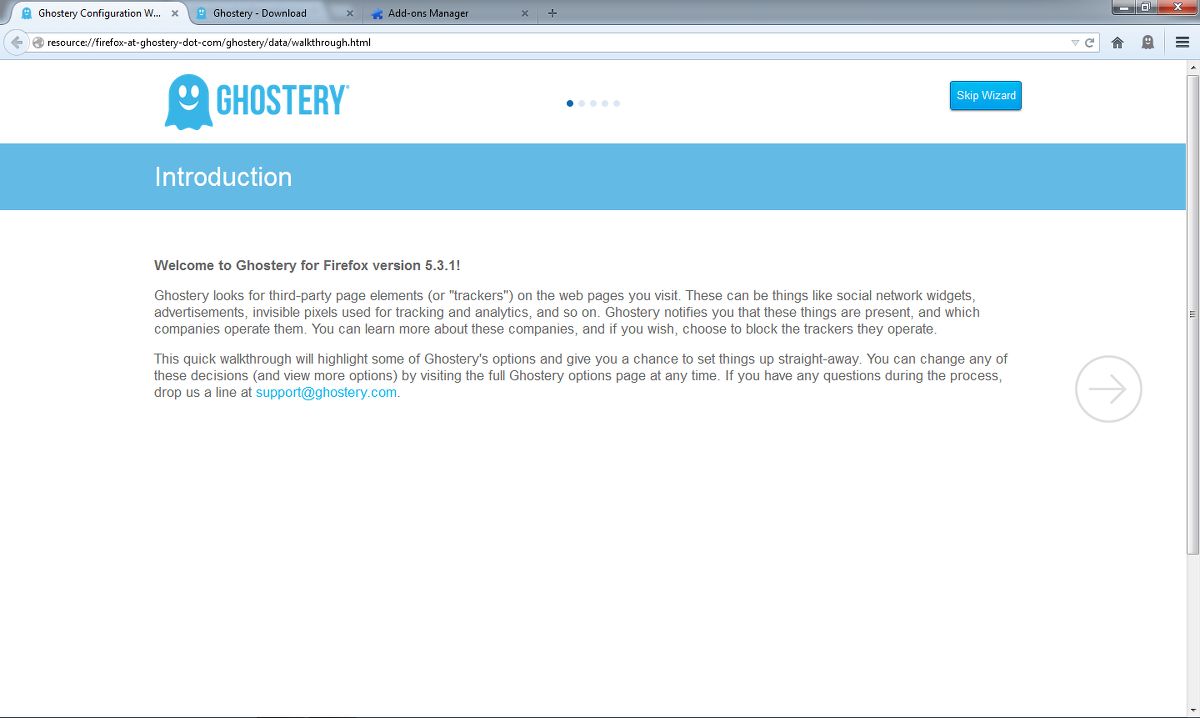
First we have to configure Ghostery. Click the right arrow on that first screen to get started. That will lead you to this screen:
- The Ghostery install wizard, page 2

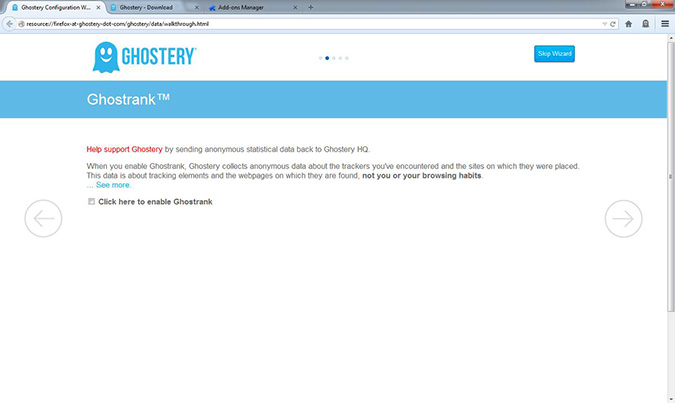
If you want to help Ghostery get better you can check this box. Then click the right arrow again and you’ll see a page asking if you want to enable the Alert Bubble.

- The Ghostery install wizard, page 3
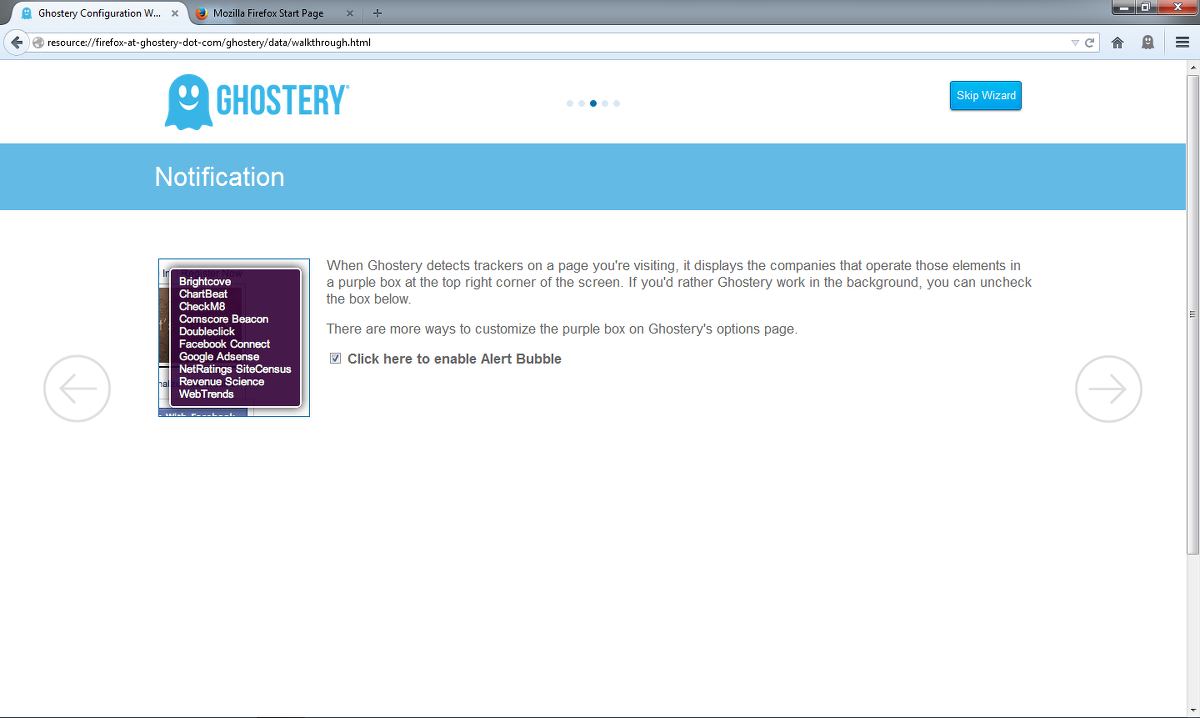
This is Ghostery’s little alert box that comes up when you visit a new page. It will show you all the trackers that are blocked. Think of this as a little window into the invisible web. I enable this, though I change the default settings a little bit. We’ll get to that in just a second.
The next screen is the core of Ghostery. This is where we decide which trackers to block and which to allow.
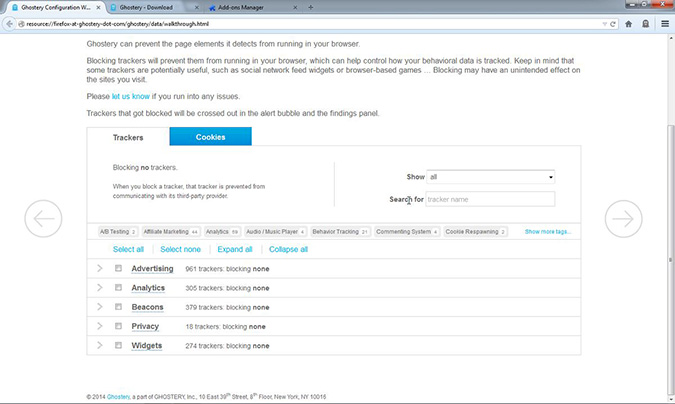
- The Ghostery install wizard — blocking trackers

Out of the box Ghostery blocks nothing. Let’s change that. I start by blocking everything:
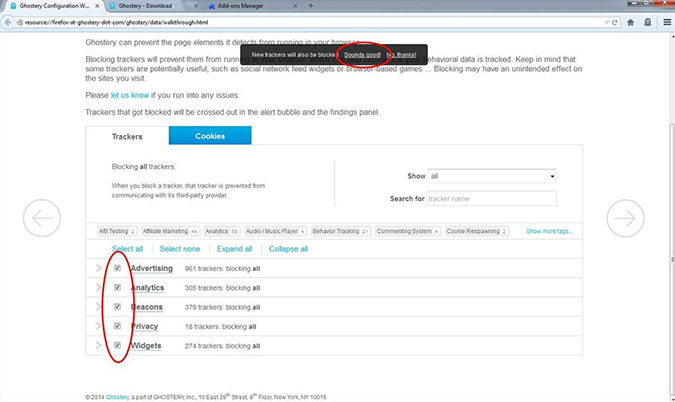
- Ghostery set to block all known trackers

Ghostery will also ask if you want to block new trackers as it learns about them. I go with yes.
Now chances are the setup we currently have is going to limit your ability to use some websites. To stick with the earlier example, this will mean Disqus comments are never loaded. The easiest way to fix this is to search for Disqus and enable it:
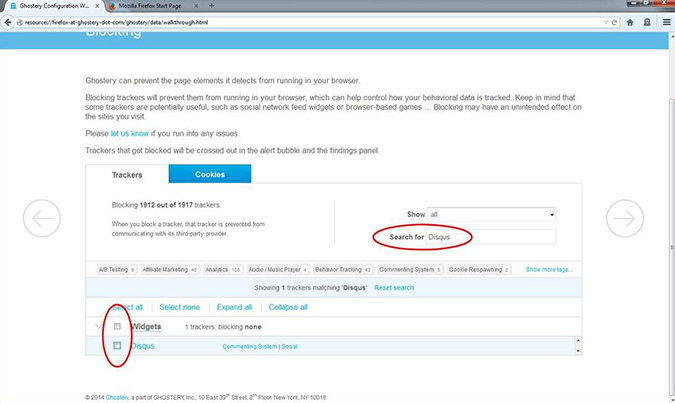
- Ghostery set to block everything but Disqus

Note that, along the top of the tracker list there are some buttons. This makes it easy to enable, for example, not just Disqus but every commenting system. If you’d like to do that click the “Commenting System” button and uncheck all the options:
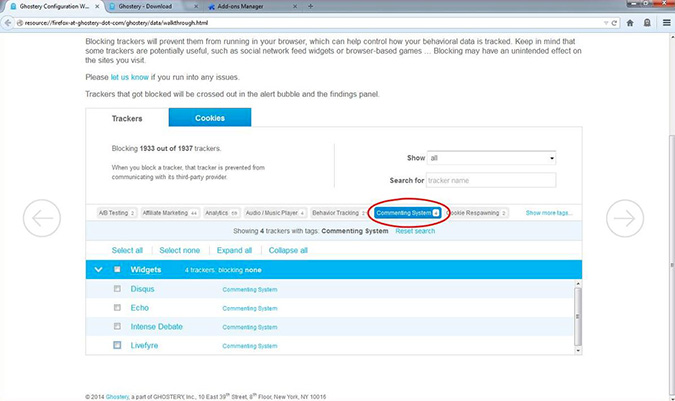
- Filtering Ghostery by type of tracker

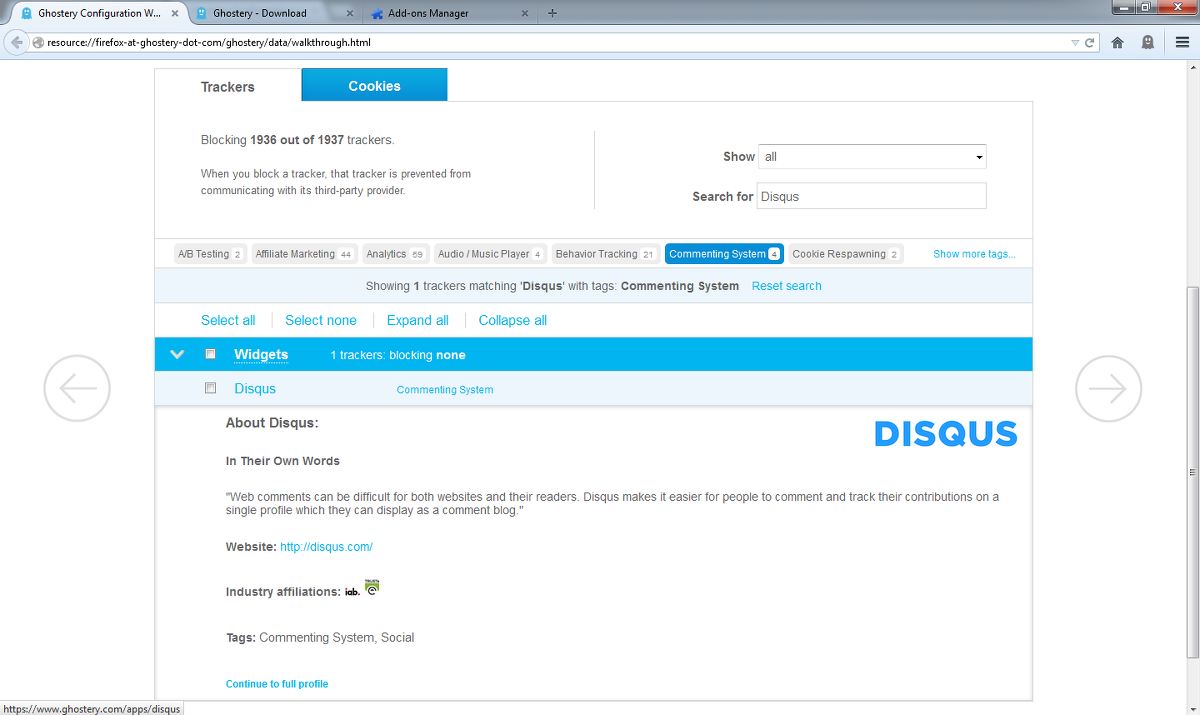
Another category of things you might want to allow are music players like those from SoundCloud. To learn more about a particular service, just click the link next to the item and Ghostery will show you what it knows, including any industry affiliations.
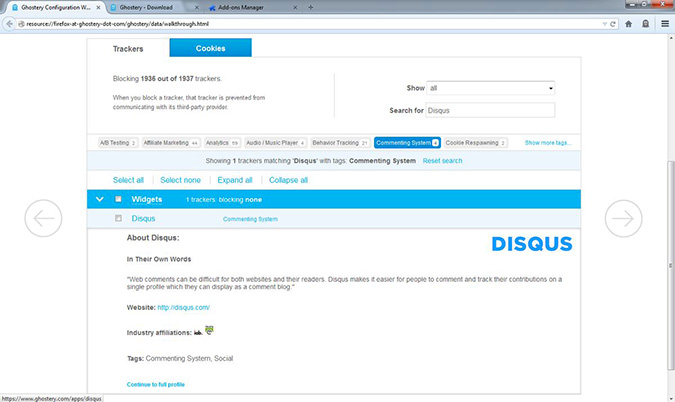
- Ghostery showing details on Disqus
Now you may be thinking, wait, how do I know which companies I want to allow and which I don’t? Well, you don’t really need to know all of them because you can enable them as you go too.
Let’s save what we have and test Ghostery out on a site. Click the right arrow one last time and check to make sure that the Ghostery icon is in your toolbar. If it isn’t you can click the button “Add Button”.
Ghostery in Action
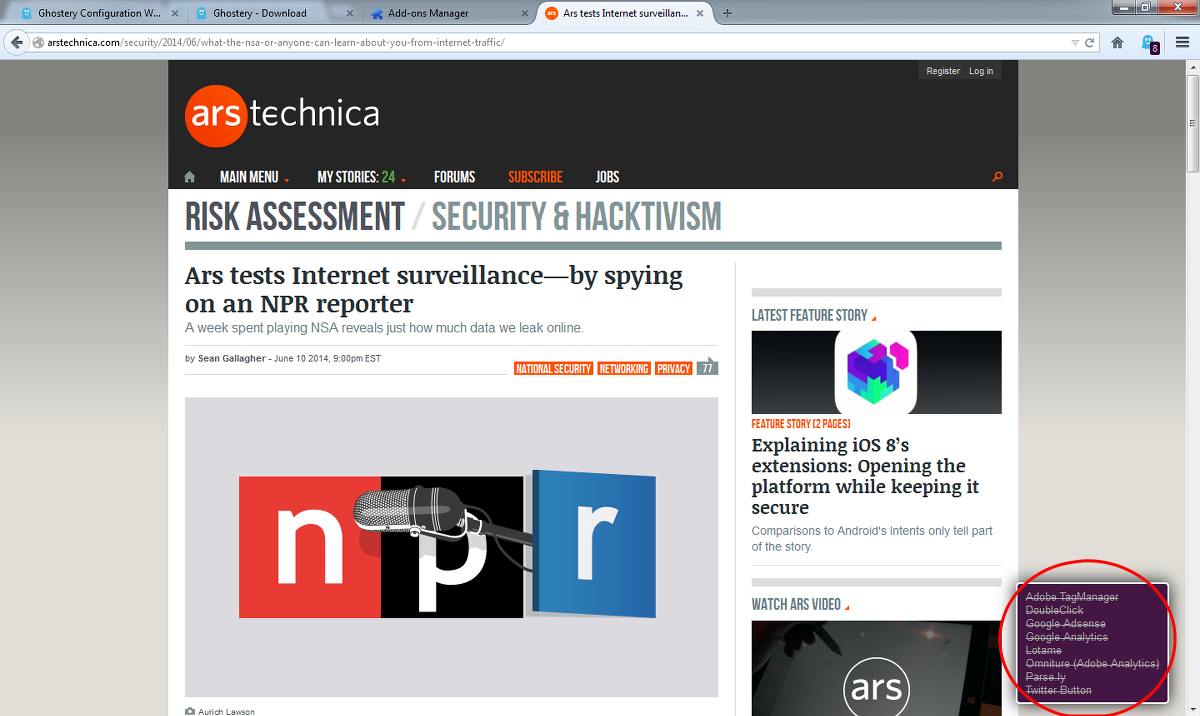
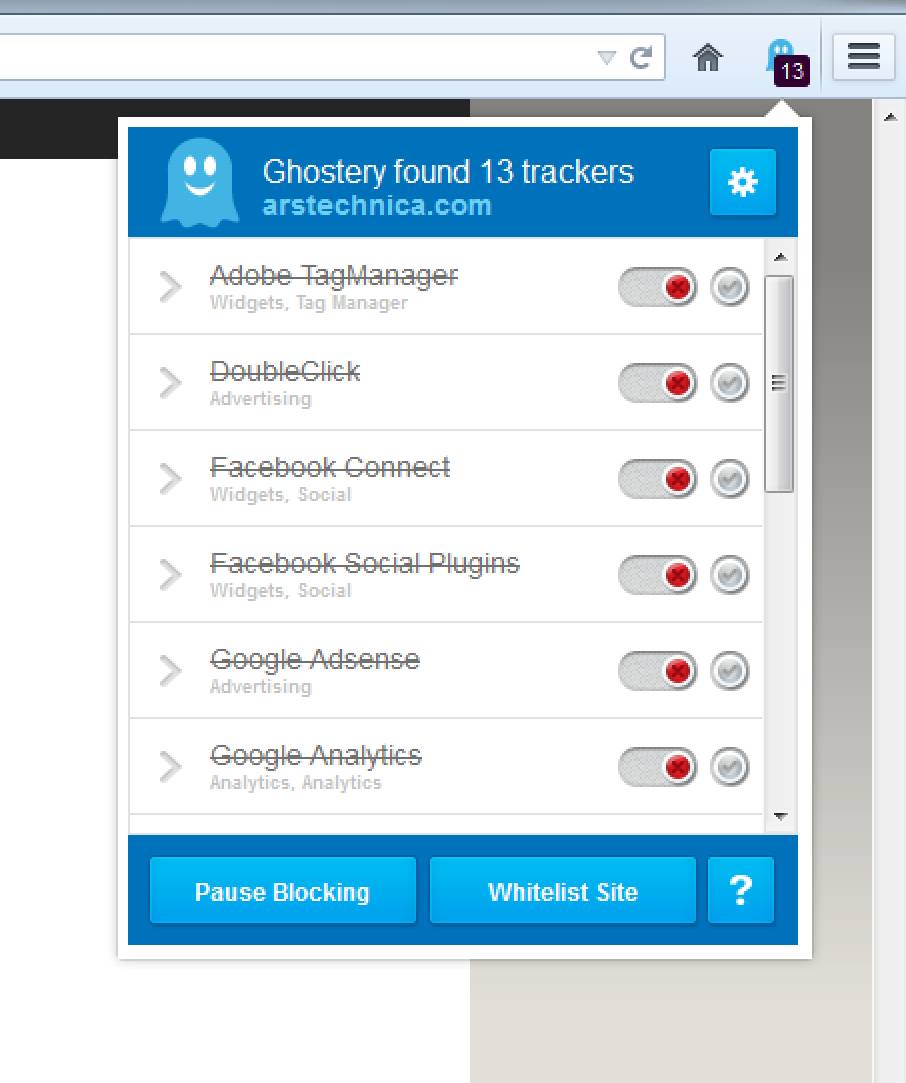
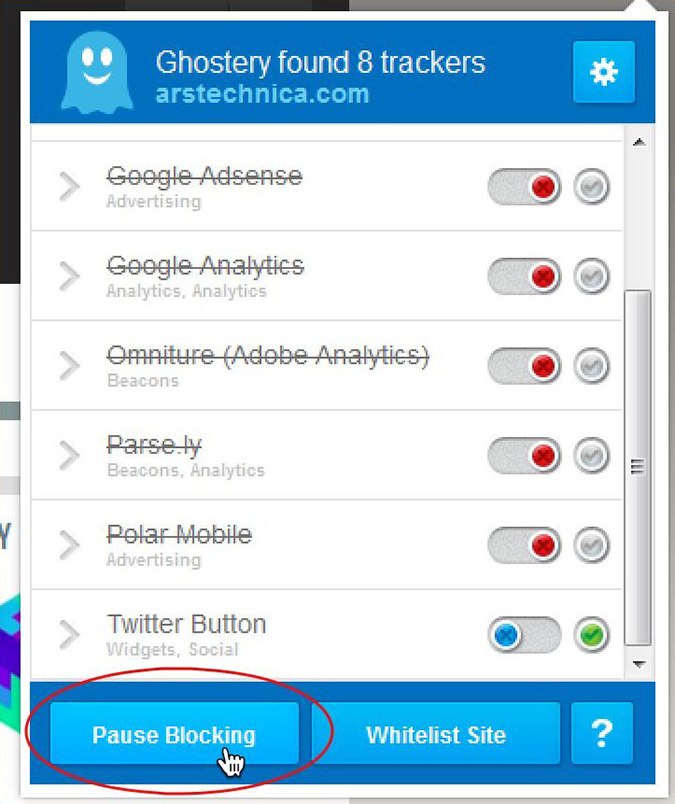
Okay, Ghostery is installed and blocking almost everything it knows about. But that might limit what we can do. For example, let’s go visit arstechnica.com. You can see down here at the bottom of the screen there’s a list of everything that’s blocked.
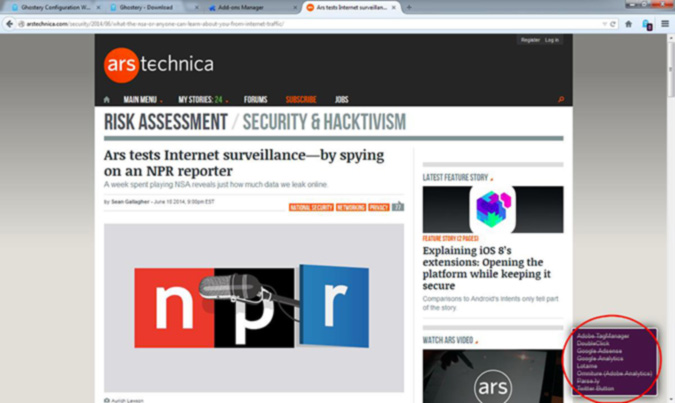
- Ghostery showing all the trackers no longer tracking you
You can see in that list that right now the Twitter button is blocked. So if you scroll down the bottom of the article and look at the author bio (which should have a twitter button) you’ll see this little Ghostery icon:
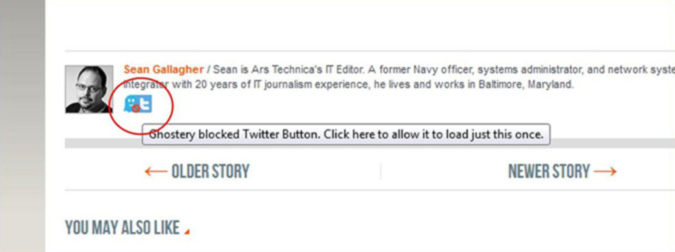
- Ghostery replaces elements it has blocked with the Ghostery icon.

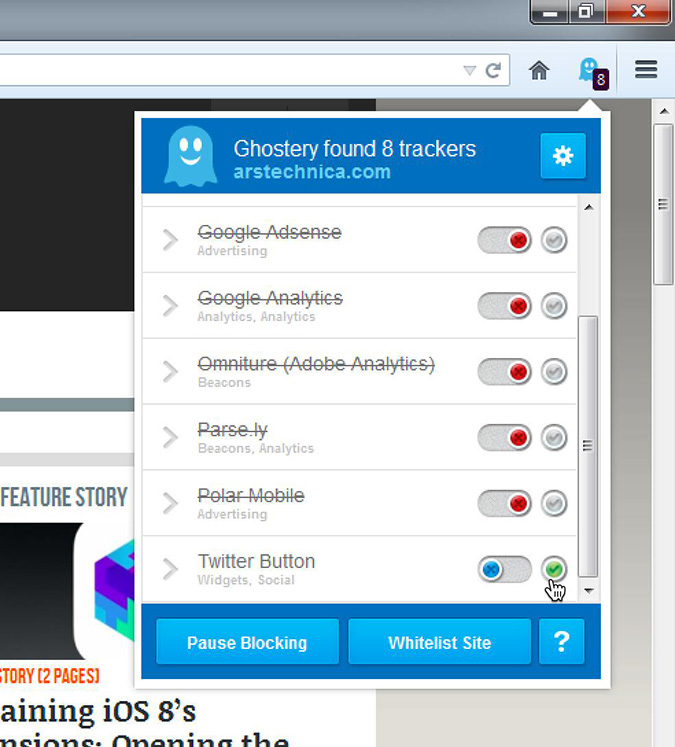
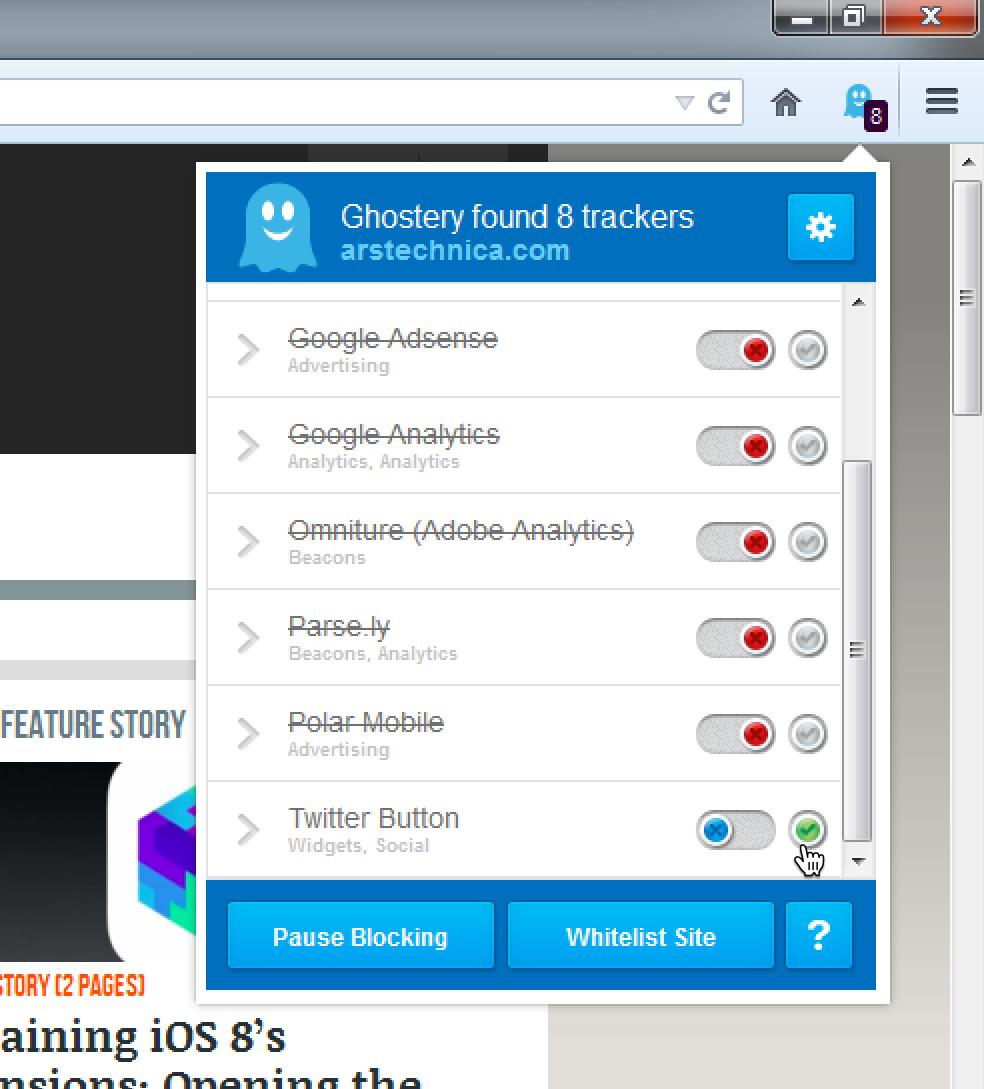
That’s how you will know that Ghostery has blocked something. If you were to click on that element Ghostery would load the blocked script and you’d see a Twitter button. But what if you always want to see the Twitter button? To do that we’ll come up to the toolbar and click on the Ghostery icon which will reveal the blocking menu:

- The Ghostery panel.
Just slide the Twitter button to the left and Twitter’s button (and accompanying tracking beacons) will be allowed after you reload the page. Whenever you return to Ars, the Twitter button will load. As I mentioned before, you can do this on a per-site basis if there are just a few sites you want to allow. To enable the Twitter button on every site, click the little check box button the right of the slider. Realize though, that enabling it globally will mean Twitter can track you everywhere you go.
- Enabling trackers from the Ghostery panel.
This panel is essentially doing the same thing as the setup page we used earlier. In fact, we can get back the setting page by click the gear icon and then the “Options” button:
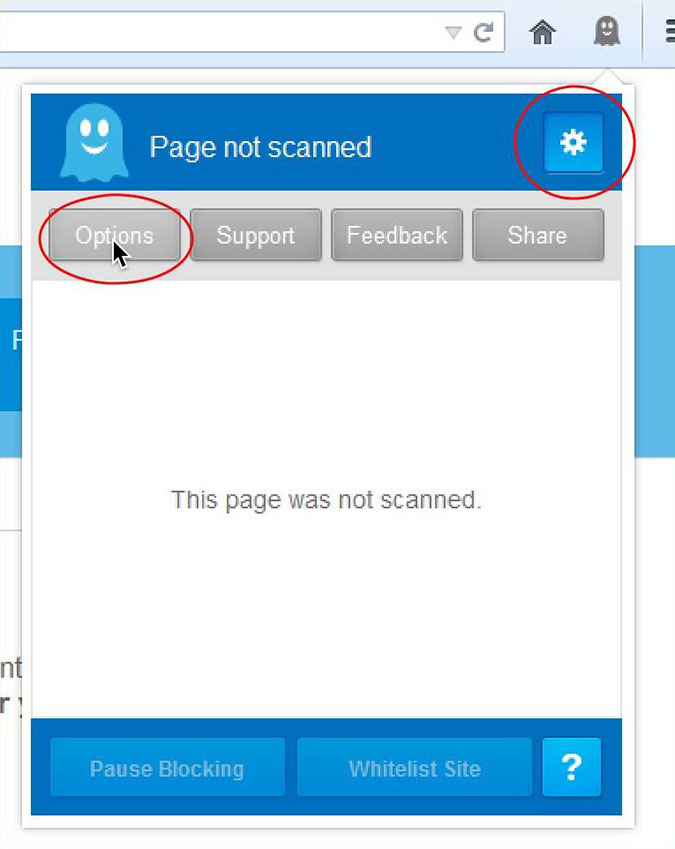
- Getting back to the Ghostery setting page.

Now, you may have noticed that the little purple panel showing you what was blocked hung around for quite a while, fifteen seconds to be exact, which is a bit long in my opinion. We can change that by clicking the Advanced tab on the Ghostery options page:
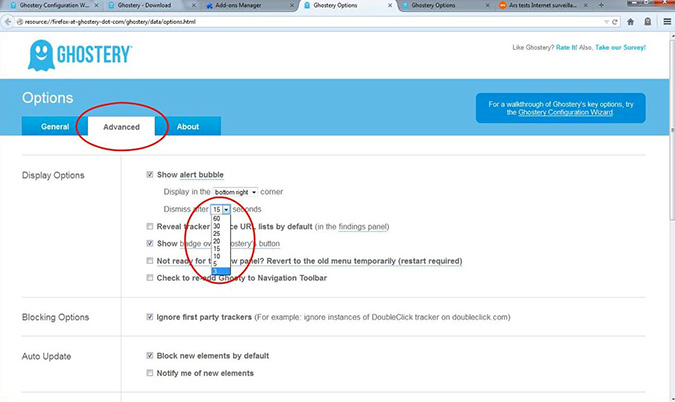
- Getting back to the Ghostery setting page.
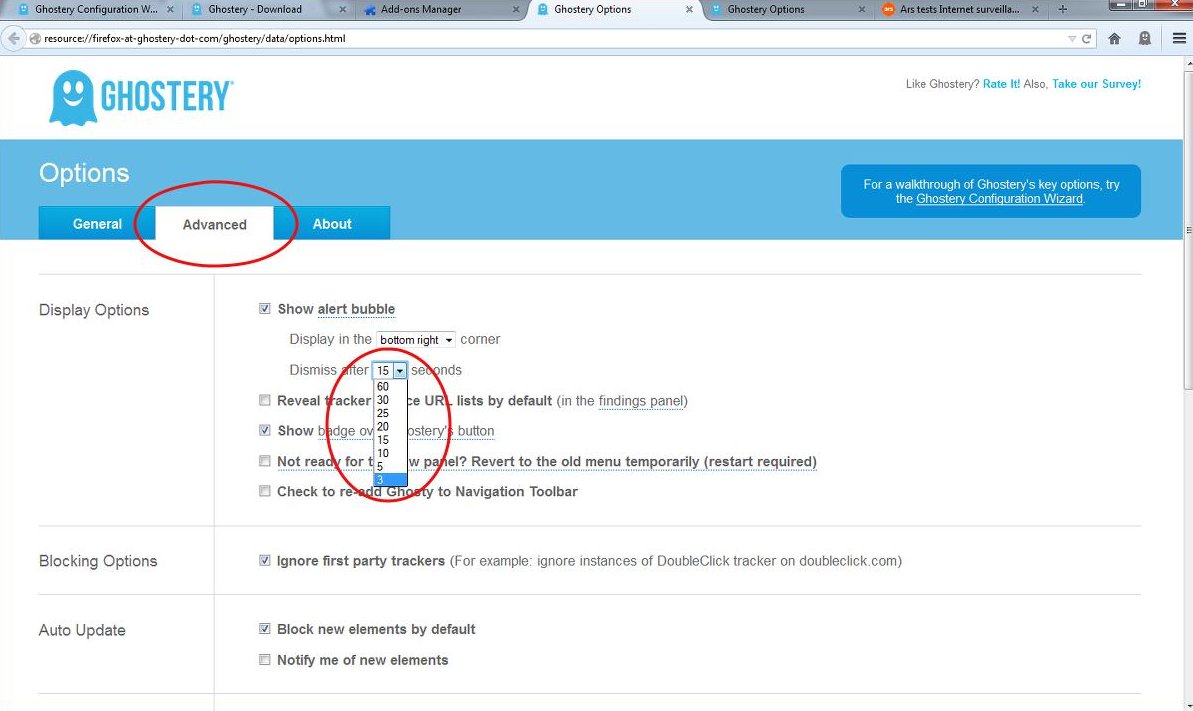
The first option in the list is whether or not to show the alert bubble at all, followed by the length of time it’s shown. I like to set this to the minimum, 3 seconds. Other than this I leave the advanced settings at their defaults.
Scroll to the bottom of the settings page, click save, and you’re done setting up Ghostery.
Conclusion
Now you can browse the web with a much greater degree of privacy, only allowing those companies you approve of to know what you’re up to. And remember, any time a site isn’t working the way you think you should, you can temporarily disable Ghostery by clicking the icon in the toolbar and hitting the pause blocking button down at the bottom of the Ghostery panel:
- Temporarily disable Ghostery.

Also note that there is an iOS version of Ghostery, though, due to Apple’s restrictions on iOS, it’s an entirely separate web browser, not a plugin for Mobile Safari. If you use Firefox for Android there is a plugin available.
Further reading:
- How To Install Ghostery (Internet Explorer) — Ghostery’s guide to installing it in Internet Explorer.
- Secure Your Browser: Add-Ons to Stop Web Tracking — A piece I wrote for Webmonkey a few years ago that gives some more background on tracking and some other options you can use besides Ghostery.
- Tracking our online trackers — TED talk by Gary Kovacs, CEO of Mozilla Corp, covering online behavior tracking more generally.
- This sort of tracking is coming to the real world too, so there’s that to look forward to.
Thoughts?
Please leave a reply:
All comments are moderated, so you won’t see it right away. And please remember Kurt Vonnegut's rule: “god damn it, you’ve got to be kind.” You can use Markdown or HTML to format your comments. The allowed tags are
<b>, <i>, <em>, <strong>, <a>. To create a new paragraph hit return twice.